Garages, French Doors, Single Exposure Alcoves
By now you have probably chosen a mesh-type & color and either (tracking or Velcro) top attachment. At this point, we recommend:
- 1Order panels & necessary hardware from our store page or call us for help.
- 2Make measurement adjustments using calculator below to give you ORDER measurements.
- 3If you want doorway not in the middle, that is okay. Just allocate widths accordingly.
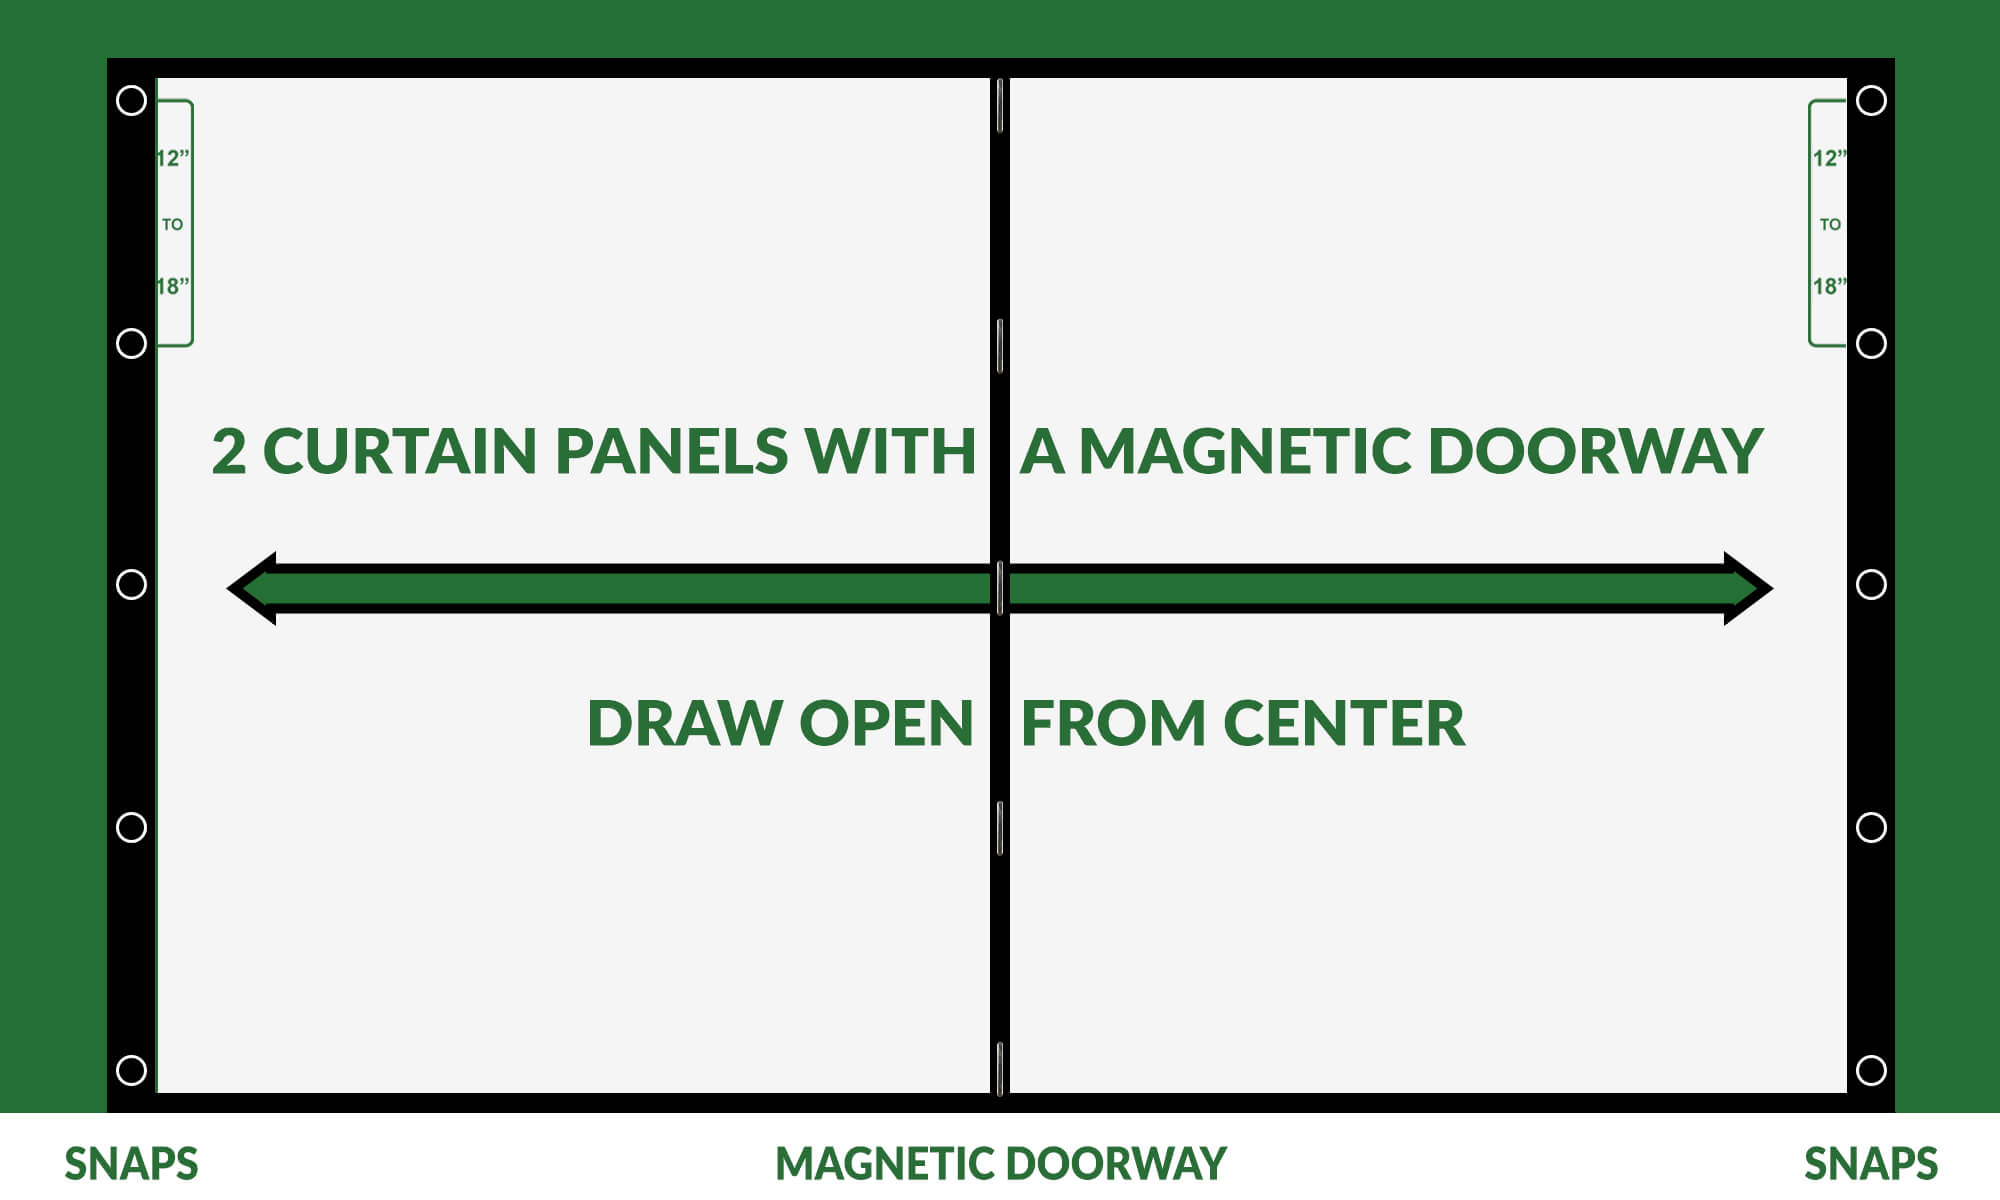
- 4If magnetic door is in the middle, divide your opening width in 2 equal widths for each panel.
- 5Measure "daylight height and width" of opening WITHOUT overlap.
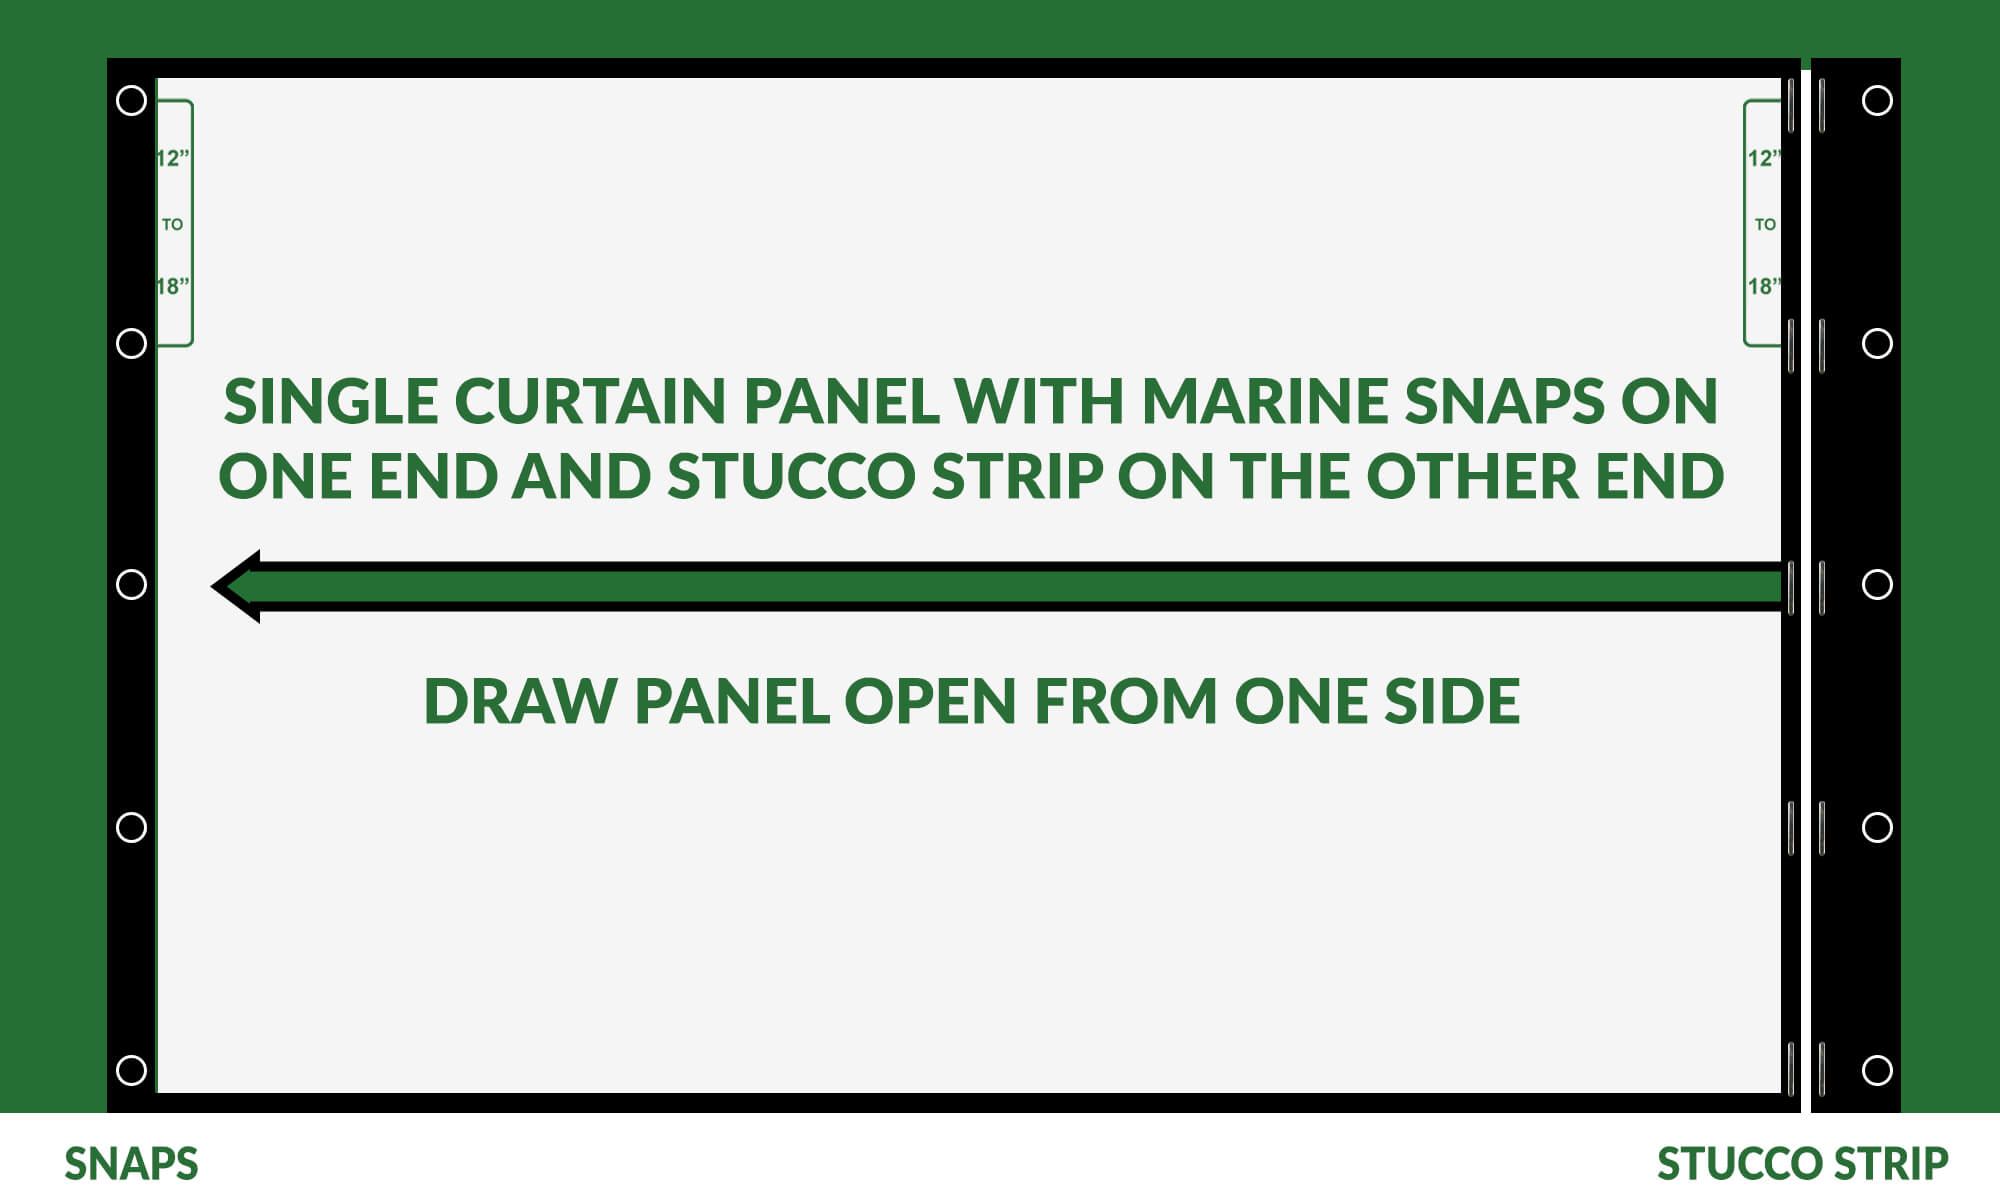
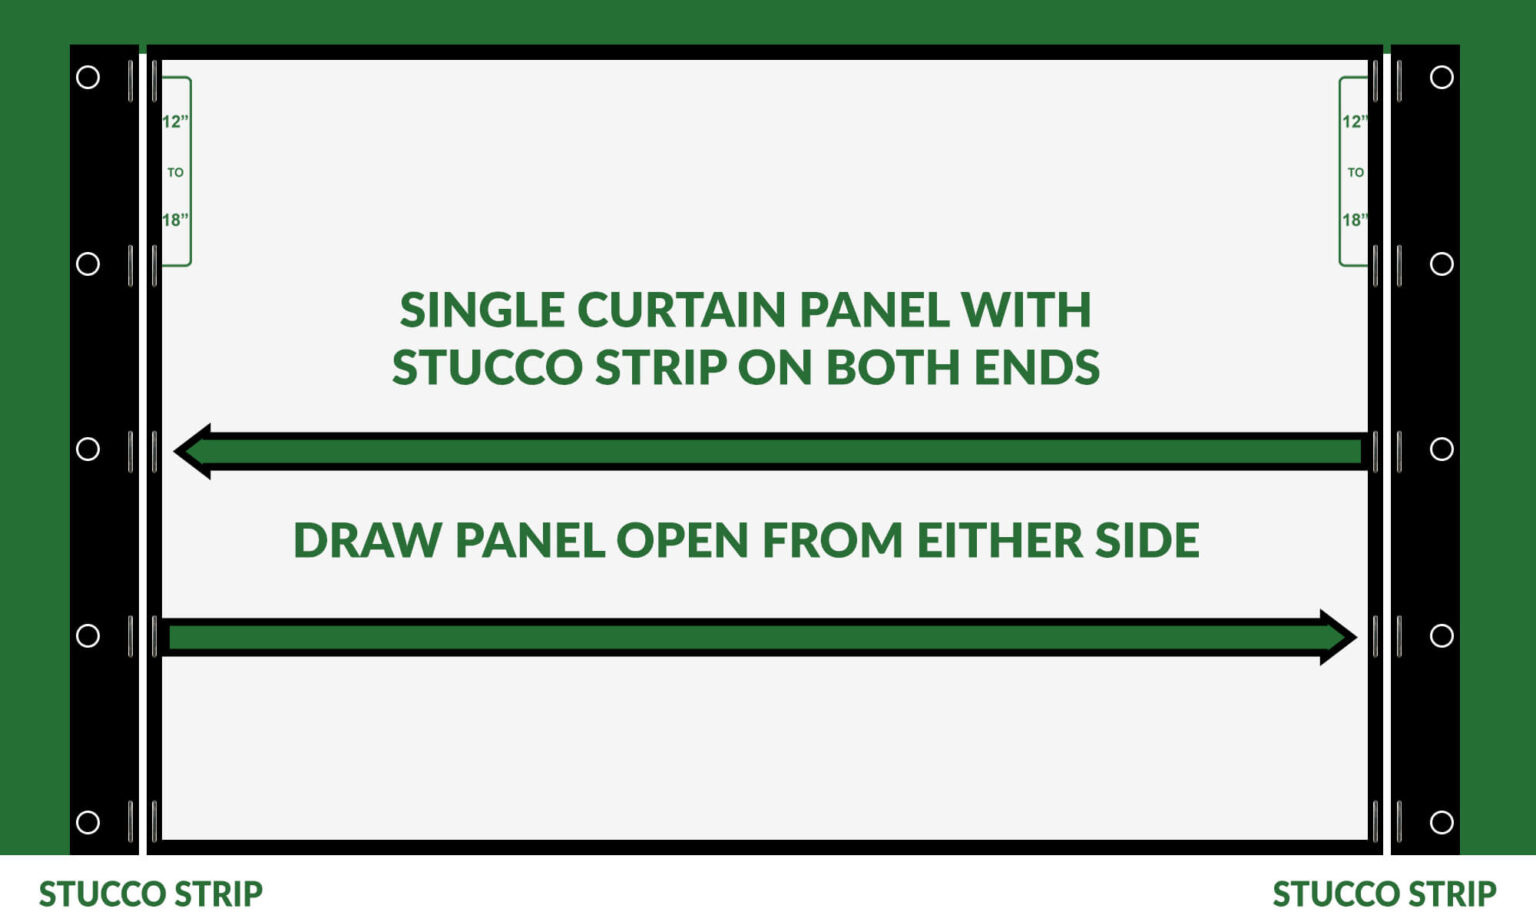
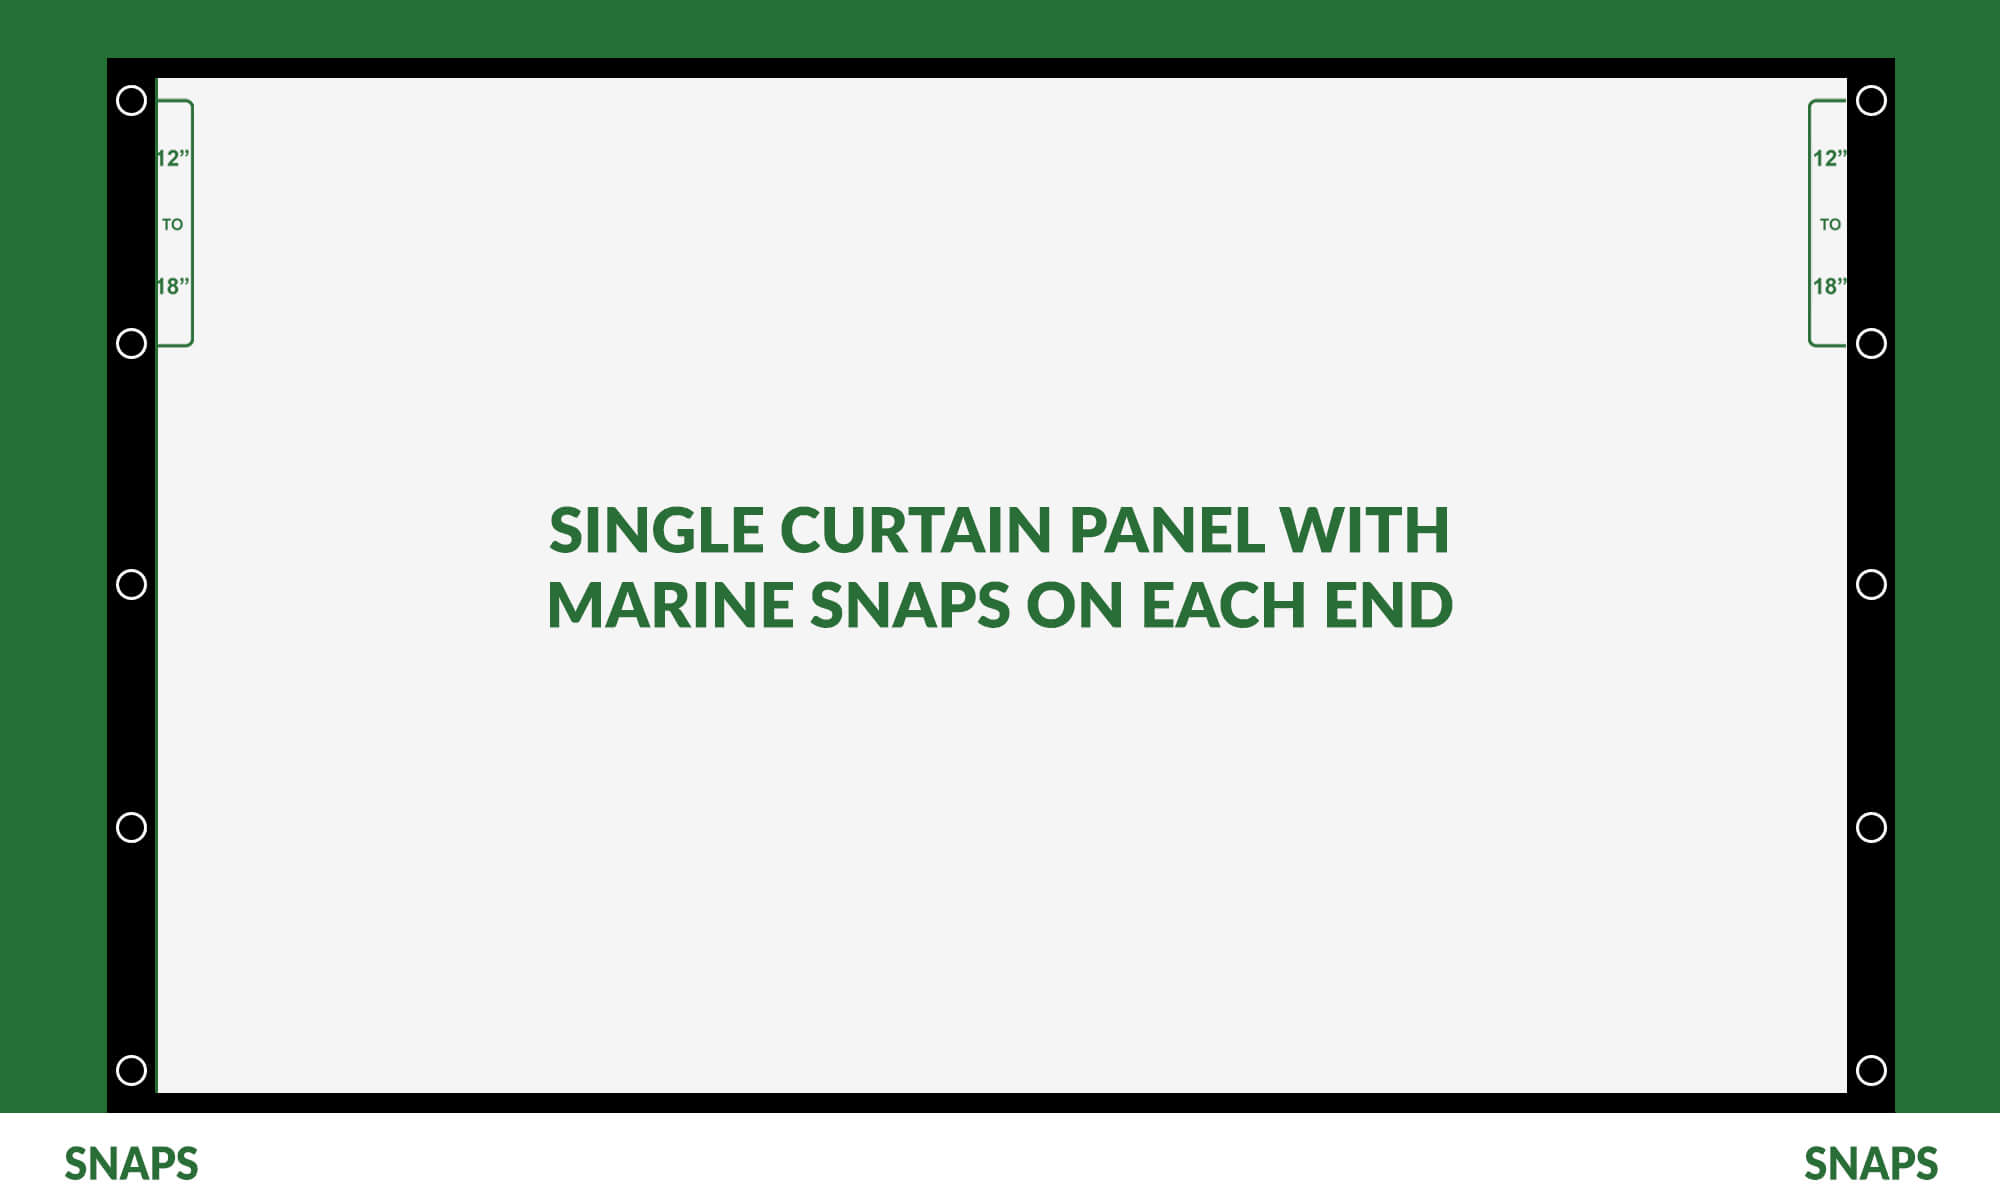
Your project will consist of 1 or more panels. The diagrams below demonstrate a few possibilities from a side view using marine snaps, magnetic doorways, and stucco strips.
Once you have your panel configuration, there are a few panel adjustments to make for each panel. The sum width of all your panels needs to be wider than your actual exposure for overlapping magnetic doors or overlapping a structural surface (like a wall or column) and a little more so that you can have a relaxed fit. Use our panel calculator below to help with your calculations.
WIDTH ADJUSTMENTS (or use calculator below)
- For Tracking Attachment: Add another 1-in per 10ft of panel width for relaxed fit
- Subtract 1-in for EACH edge connecting a Stucco Strip, and ignore width of stucco strip
- Add another 1-inch per panel for EACH edge that will snap to some surface
- Automatically add 2-inches per panel regardless of width, then
HEIGHT ADJUSTMENTS
- Measuring is done from the bottom of the track mounting surface to the floor.
- NO height adjustments necessary for tracking. The 1-inch drop in the track will automatically give you a 1-inch overlap with the floor.
Simple Panel Adjustment Calculator
This simple panel calculator will make your panel adjustments for each panel, one at a time! Use this calculator by entering the 5 pieces of information required to adjust your panels. Repeat for each panel larger than a stucco strip.
NOTE: If the difference between all 4 heights is less than 1.5-inches, just use the tallest of the 4 heights. If the heights differ more than 1.5-inches, call in your order because we will need to taper the slope.
Unadjusted Panel Size
Side & Top Attachment
Final Width & Height
Ready to Order?
Ready to Enjoy Your Outdoor Space?
Get a custom quote in minutes. Our planning team is here to help you create the perfect solution for your home.